These instructions describe how to create and publish a post.
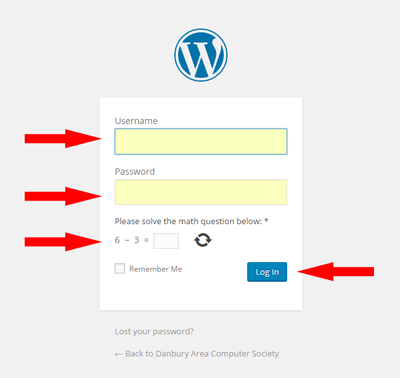
Login at https://dacs.org/wp-login.php
The login page opens, login with your provided credentials.
Once logged in, the “Dashboard” opens. The navigation links are on the left.
Notice the black bar at the top of the window. To view the ‘front end’ of the site, hover over the top-left name, and click the “Visit Site” link.
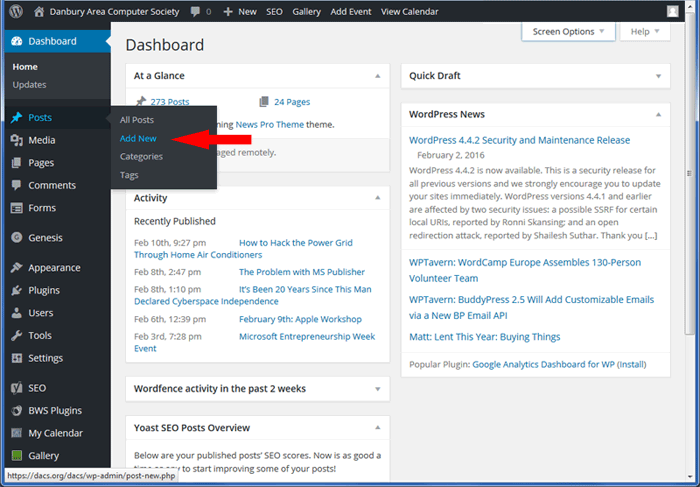
You may not see as many links as shown below, but the Posts link will be there, and will show only posts published by you. Hover over “Posts“, then click “Add new“.
The new post interface opens.
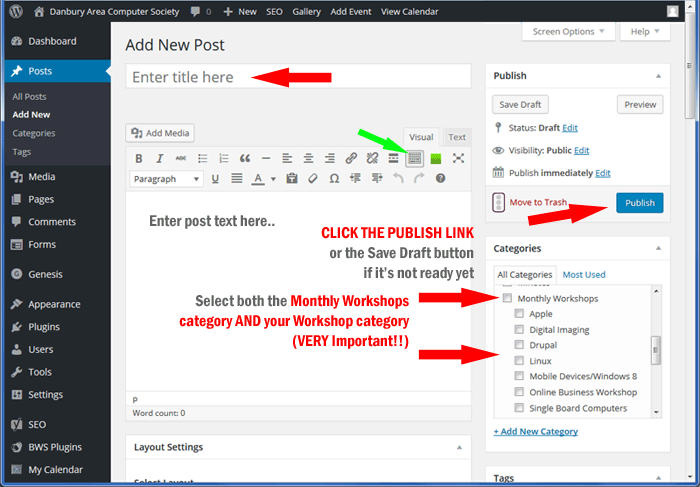
Add the post title in the top field. Not too long, but clearly describing what the post is about. If it’s a Workshop/SIG announcement, include the month/year date in the title.
Enter the post text in the large middle field. Use the edit tool bar as needed. If you don’t see the second row, click the icon shown below by the green arrow.
Once the title and post has been entered, select the appropriate workshop category in the Categories box on the right side. (If not set, the post will not display anywhere!) Also select the parent category Monthly Workshops.
Once the post is ready, click the blue “Publish” button. (If it’s not quite ready but you want to save it, it can also be saved as a “Draft“, the button is under the “Publish” title, top right.)
Once the post is published it will automatically display on the home page, and on the Category archive page.
If you want to edit your post at a later time, hover over the “Post” link, and click “All Posts“. This will open a window that displays the posts written by you (only). Hover over the post title to make the “Edit” link appear. Click that and edit as needed. Make sure to click the blue “Update” button when done.
You do not need to add your author by-line, if you’re logged in with YOUR credentials, your name will automatically appear at the top of the post.